Step 1: Log into cPanel:
Use your cPanel login details to access your account.
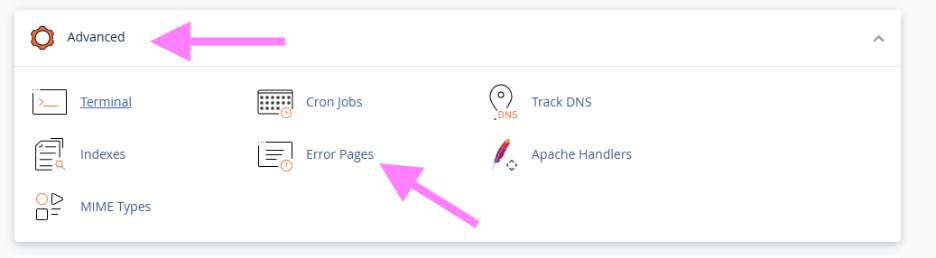
Step 2: Navigate to Error Pages:
On the cPanel homepage, look for the “Advanced” section and click on the “Error Pages” option.
Step 3: Select the Error Code:
A list of common HTTP error codes will appear, such as 400 (Bad Request), 401 (Unauthorized), 403 (Forbidden), 404 (Not Found), and 500 (Internal Server Error).
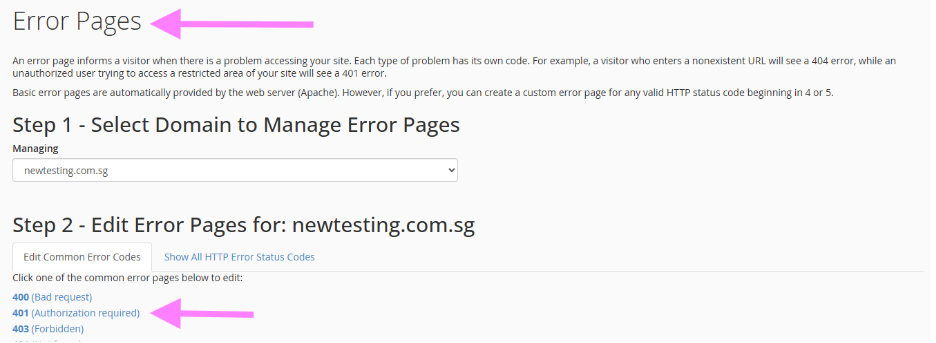
Choose the error code for which you want to set up a custom error page.
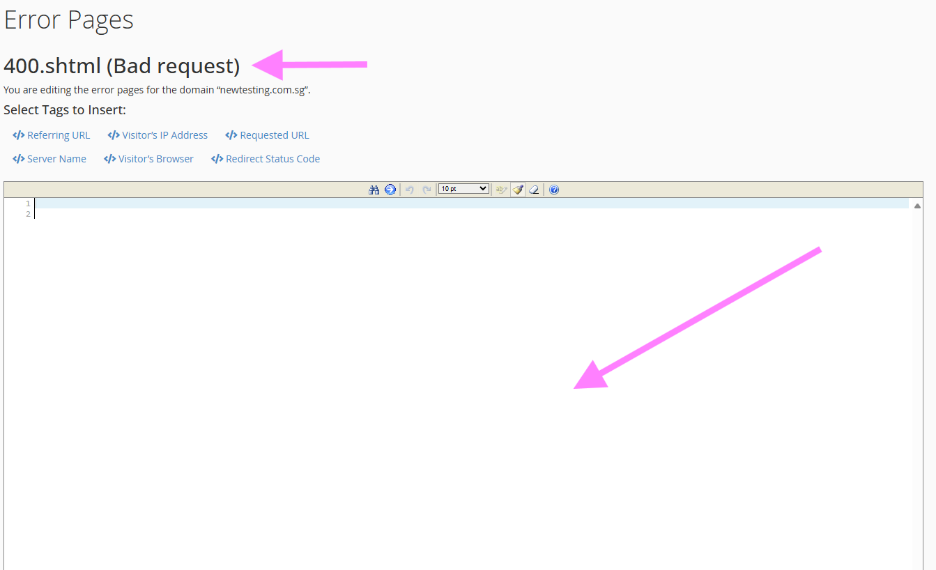
Step 4: Edit the Error Page:
The page will open in a text editor, allowing you to input the HTML code for your custom error page.
You can personalize the content by adding text, images, and styling to match your website’s appearance.
Step 5: Save the Error Page:
After making your desired changes, click the “Save” button to apply the new settings.
